A script and a boilerplate
@create-soroban-dapp is both a npx script and a boilerplate dapp for kickstarting any of your ideas for a Soroban-based Dapp.
Largely inspired by the ink!athon project by Scio Labs and by @create-t3-app by T3 Open Source for the script mechanisms.
Check the LIVE VERSION of the dapp that is already utilizing a deployed testnet contract!
Structure
@create-soroban-dapp is composed of two things:
-
A boilerplate dapp utilizing the @soroban-react.
-
A npx script that allows developers to quickstart their project via the command line and
npx create-soroban-dapp. Using the script will help them set up the boilerplate dapp.
Usage
Open a terminal in the folder of your choice and simply use:
npx create-soroban-dapp@latest
or
npm create soroban-dapp@latest
Then, navigate inside the new project directory:
cd projectname
Manual cloning
If you prefer to manually clone the repository instead of using the NPX script, follow these steps:
Clone the Repository
Clone the repository using the following command:
git clone git@github.com:paltalabs/create-soroban-dapp.git
Navigate to the Project Folder
The main project (dapp) will be located in a subfolder named soroban-react-dapp, not in the root directory. The root directory is occupied by the NPX script.
Navigate to the subfolder:
cd soroban-react-dapp
Install Dependencies
Inside the soroban-react-dapp folder, install the necessary dependencies. You can use Yarn, npm, or pnpm as per your preference:
yarn install or npm install or pnpm install
Important Note: When using this manual cloning technique, you will also clone the NPX script located in the root folder. This script will not be necessary for your manually cloned project. You can choose to keep only the
soroban-react-dappsubfolder, which contains the actual Next.js project.
Troubleshooting
This script is still in its early stages of development and might not function perfectly on every operating system and configuration. If you encounter any issues, please report to devs@paltalabs.io
Set up your secrets!
When deploying our contracts, you will need the secret key of the deployer account. This secret key will be stored in an ignored file located at ./contracts/.env.
To set up your secrets, first copy the example environment file:
cp contracts/.env.example contracts/.env
If you are already inside the contracts folder (such as when using a Docker container), simply use:
cp .env.example .env
Next, edit the .env file and add your secret keys. The file will look like this:
# Stellar accounts Secret Keys
ADMIN_SECRET_KEY=

# RPC Setup
MAINNET_RPC_URL=
You can generate new Accounts and Private Keys from Stellar Laboratory
If you plan to deploy on the Mainnet, you will also need a Mainnet RPC Provider. Find one in Validation Cloud or Nownodes
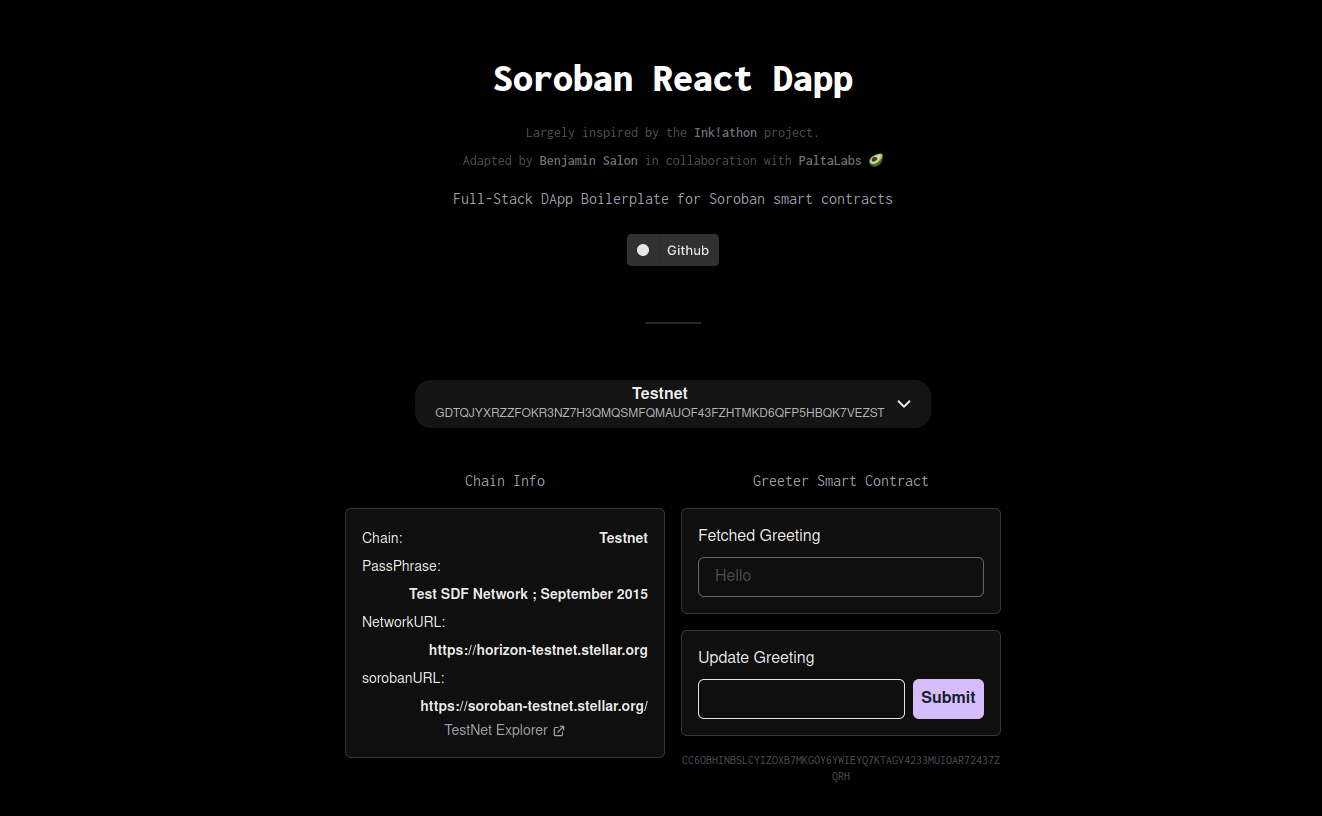
Welcome to your soroban react dapp boilerplate!
This dapp largely inspired by the ink!athon project will help you kickstart your soroban dapp creator journey.
Getting started
If it's not done already, you will need first to run the create-soroban-dapp script.
If you prefer it is also possible to clone the boilerplate repo manually.
We now suppose you ran the initialization script and that you have a folder containing the soroban-dapp next.js project.
The customization of the dapp will be done following these steps:
- Verify Installation
- Customize app data
- Create and build your own contracts
- Deploy your contracts on tesnet
- Retrieve contract object in the front-end
Good luck building!
Verify Installation
Run the app on a local server
To verify that everything is in order, open a shell in the nextjs soroban-dapp folder, and run
# If you use yarn
yarn dev

# If you use npm or pnpm
npm run dev
pnpm run dev
This will start the development server. The dapp will be available on localhost.
The dapp should display the current greeting set in the testnet smart contract.
If you encounter an error, make sure you have installed the dependencies of the project!
Try the dapp
Connect your wallet and check if you can interact with the dapp by sending a new greeting!
You may need some tokens from the faucet to interact with the testnet.
You can fund your wallet address with the testnet friendbot at
https://friendbot.stellar.org/?addr=YOUR_ADDRESS_HERE
Customize app data
You can start by modifying the TODOs with your own data (None of them is mandatory to change):
- Name of the package in package.json.
- All the dapp info in _app.tsx.
- Manifest and favicon in _document.tsx.
Manage contracts
The soroban dapp boilerplate comes with an carefully thought contracts organization and scripts which will allow you to manage your contracts compiling, deployment and integration in a simple way.
To see the details and how to use it see
- Contract folder organization
- Create and build contracts
- Deploy using the script
- Retrive the contract object in frontend
Contract folder organization
In the contracts folder you will find all the Rust contracts you are using for your dapp as well as the deploy scripts and the registry of all deployed contract in deployments.json:
contracts/
    contract1/
        src/
            lib.rs
            test.rs
        Cargo.toml
        Makefile
    contract2/
    ...
    scripts/
        deploy.ts
    utils/
    Makefile
You will also find some makefiles which are used in the deploy scripts to automatically recompile the contracts if they have been updated.
The contract folder is a typescript package in itself and its dependencies need to be installed in order to build the scripts.
Create and build your own contracts
The contracts workflow happens in the contracts/ folder. Here you can see that the greeting contract is present already.
Every new contract should be in its own folder, and the folder should be named the same name as the name of the contract in its cargo.toml file. You can check how the tweaked_greeting contract is changed from the greeting contract and you can also start from this to build your own contract.
To build the contracts you can simply invoke the make command which will recursively build all contracts by propagating the make command to subfolders. Each contract needs to have its own Makefile for this to work. The Makefile from the greeting contract is a generic one and can be copied and paste to use with any of your new contract.
If you are not familiar or comfortable with Makefiles you can simply go in the directory of the contract you want to compile and run
# This will create the target wasm blob under target/wasm32-unknown-unknown/release/contract_name.wasm
cargo build --target wasm32-unknown-unknown --release
If it's your first time manipulating soroban contracts you might need to add the
wasm32-unknown-unknowntarget to rust. For this runrustup target add wasm32-unknown-unknown.
Follow instructions you find online if not working ( search for "add target wasm32-unknown-unknown to rust" ).
Deploy your contracts using the provided script
Now that you have added your contract to the project, you can deploy the contract to any network of your choice.
Add a deployer secret key in the .env file
First thing you need to do is to copy paste the .env.example file to create a .env file which will be used to retrieve the deployer secret key by the script. Just add any valid secret key to the .env file under the field ADMIN_SECRET_KEY.
Run the contract
Then we can use the script provided in the contracts folder: scripts/deploy.ts. The script is using stellar-js under the hood.
The contracts folder is a typescript package itself which needs to have its dependencies installed:
# From the contracts folder run
yarn
#
npm -i
#
pnpm -i
The script can then be called using yarn (or any package manager)
yarn deploy network_name contract_name_1 contract_name_2 ...
Replacing network_name by one of testnet|futurenet|standalone|mainnet and adding all the contracts name you want to deploy as next arguments.
For instance if I want to deploy the greeting contract on testnet I will run:
yarn deploy testnet greeting
Under the hood the script will
- Load the pair provided in the .env for the deployer identity
- Fund the deployer identity using Friendbot
- Deploy the contracts on testnet
- Add the contracts deployment infos in
deployments.json
Retrieve the contract object in the frontend
Get the contract wrapper object using the useRegisteredContract hook:
In the file [GreeterContractInteraction.tsx], you can see an example of how to retreive the contract object in the front end:
You first need to import the useRegisteredContract hook in your page here:
import { useRegisteredContract } from '@soroban-react/contracts'
Then you have to call the hook with the name of the contract you want to fetch as a parameter:
const contract = useRegisteredContract("greeting")
The hook will fetch the contract directly in the deployments object passed to the context here and the values will correspond to the values in the deployments.json file updated automatically when the deploy scripts are called.
Contract wrapper object
The contract object has two fields, the deploymentInfo object and the invoke method:
contract
    .deploymentInfo (Object)
        .name
        .networkPassphrase
        .contractAddress
    .invoke (Method)
The deploymentInfo object
deploymentInfo is directly corresponding to the object you can see in the deployments.json, looking like the following:
{
    "contractId": "greeting",
    "networkPassphrase": "Test SDF Network ; September 2015",
    "contractAddress": "CDKU2ZVK2RV3JFPPNAVYHGHMSXD7RENEVMEPURNKEECM7FDVH7WHI7ZO"
}
The invoke method
The invoke method is a wrapper around the contractInvoke method from @soroban-react. It basically use the latter with some parameters computed from the deploymentInfo of the contract and the current context to simplify its calling.
The syntax to call a method of the contract object is as following:
const result = await contract?.invoke({
    method: 'set_title',
    args: [stringToScVal(newMessage)],
})
Where method is the name of the smart contract method you want to call and args the arguments the method expects converted into ScVal.
Fly with your own wings
You are now normally all set! This is your time to shine and show your mastery of Rust and React to build the best dapp!
The idea is for you to inspire yourself from the two methods implemented in the boilerplate (one getter, one setter) to now connect to your own smart contracts and craft the adequate frontend.
Wishing you good luck
SOROCHAT dapp tutorial
SOROCHAT is a nice little messaging dapp built using create-soroban-dapp for demonstration purpose.
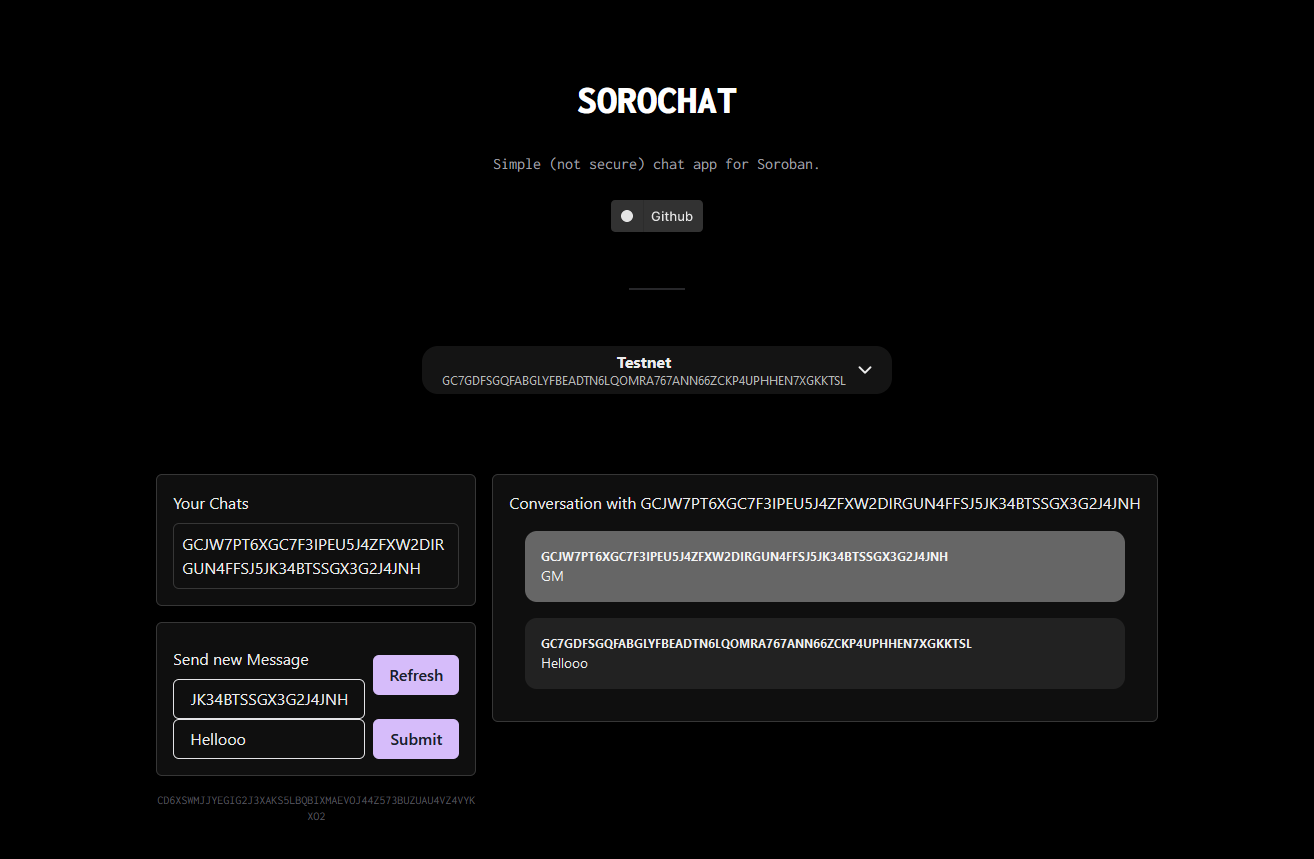
Submitted and awarded for the Sorobounties 2024.
Tutorial on Dev.to
You can find a written tutorial explaining how to create the dapp on dev.to 🚀